Saturday, November 1, 2008

False Colors


This tombstone was photographed in Lexington, MA. The thing that makes it look strange is the false colors, somewhat inspired by the old infra-red Ektachrome film from the 70's. I selected areas throughout the image and then either re-colored those areas or washed over existing colors with Photo Shop paint brush.

Through the Looking Glass


When you train your camera on water, mirror or glass reflections you get a perspective that's different than observing real life directly. In photography different is good. However it's important to maintain compositional principles while creating a "different" looking image.

The Prince


When I travel back in time I go to the Renaissance Fair up at Mount Hope in PA. Of course I take my camera. I found this to be an interesting exposure for a number of reasons. Firstly, I decided to use a movie tri-pod with a fluid head to try to capture the smooth motion of people walking or riding their horses. What I discovered is that when I followed this horse and rider through the crowd with the camera two things happened. 1) The crowd, of course, was rendered blurred and apparently out of focus and 2) the saturation of the colors of the crowd was diminished accenting the vivid blue of the prince's coat.

Sunday, October 5, 2008

Wedding of the Teapot Clown: Fantasy or Reality


This is a photo from a wedding I shot recently. The Groom is actually in the background. The Clown is entertaining at the wedding.

Saturday, October 4, 2008

Close up "Helicopter seed in Motion"


This is an extreme close-up of a seed we like to call the "helicopter" because of it's ability to navigate, with a helicopter motion, away from its source. When you photograph something this close it's impossible to capture motion and critcal focus at the same time (and forget about background elements being where they should be.) A shot like this has to be manufactured using Photoshop. In my studio using close-up diopters, I photographed a close up of the seed, critically focusing. I used a studio flash to get a translucent image of the seed. I also used aluminum foil as a lens hood to fill the front of the seed with light. The background was black.

Then I cut out the seed by removing the black background and proceeded to layer on the effects. The background tree canopy rendered out of focus with Gausian blur, about 20 layers of "seed motion" and then the seed itself. Lastly I flattened the image and accentuated the sun glare using paint brush so that it washed all the layers.

Thursday, September 25, 2008

Principles of close-up still life


This photo is a close up of a blueberry. Using Macro diopters on the front of my lens, I arranged various nuts around the berry. The nuts are earthy tones, warm tones while the blueberry stands cool and dark in contrast.

I saturated the blueberry with Photoshop to give it a bluer appearance.

Special note: When you do close-up photography the same rules apply as if you were doing a full-size still life. Note the rule of thirds applied, the foreground framing and the background design which balances the composition and leads the eyes to the subject.

Back light is used for lighting with a silver reflector adding foreground fill

Tuesday, September 23, 2008

Pre-focus


Sometimes you can't rely on auto focus to give you that sharp focus. Probably the most difficult focusing situation is when you have a moving subject obstructed by foreground elements. In this case Joan is riding her horse rapidly toward the camera with her face framed between two lances in the foreground. You can't possibly focus manually fast enough. How do you handle this?

You PRE-Focus. Pre-Focus on a spot on the field where you know the rider will be passing through, set your aperture on f/11 to f/16, shutter speed around 300th of a second and shoot about 5 frames a second as she fills the pre-focused area.

Anytime a subject is moving toward you at a fast pace it is always a good idea to Pre-focus.

Friday, September 19, 2008

Altered Reality with Photo Shop


This is a Photoshopped altered reality image inspired by Shakespeare's Midsummer Night's Dream. It's called Titania (after the fairy queen in the play).

There are three layer elements which make up this image.

1) The background
2) The subject
3) A prop or props

The background was taken with the idea that I'd be adding subject matter to it. It's simple but has classic elements, namely backlighting (which is favored by most schools of landscape art)
A tunnel to draw your eye to the subject and a diffused light source.

The subject was an attractive model from a Shakespearean dress rehearsal (she is made subtlely translucent to give a "spirit" look). Costumes and permission all inclusive.

The prop is a set of moth wings (notice that they are made considerably translucent with the opacity control). I chose moth wings because one of the fairies who introduced the magical element of Midsummer, speaking to Puck, called herself Moth. Moth wings rather than butterfly or bird wings gives the image a more foreboding and dangerous element. The spirits Shakespeare portrayed were not to be trifled with.

A "wash" with a broad white paintbrush set at about 5% opacity creates a foreground mist.

Sunday, August 3, 2008

Composite Pages


Composite pages can be used for scrapbooking, photo albums or wall framing. You pay for the price of one photo but get as many photos as you can fit on one page! In this case, I've put 8 images (all vignetted) on a square black background. You can use whatever color or shape background you want. Or you can use an abstract image, an out of focus detail, sky or some type of scenery as a background. Use Photo Shop to create a background layer. You can make it translucent, B&W or monochrome. Then with multiple layers and about a 30% vignette on every image (cut and paste with marquise tool) start laying in and arranging and resizing your images to your satisfaction.

Tuesday, July 22, 2008

Streaming Rays of Light


Light is the most important factor in photography. More so than subject matter. Light is the medium for photographers just as paint is the medium for the painter.

Where is beautiful light seen at it's best? When it is streaming visibly through water molecules into a wood canopied by tree leaves. Get up early in the morning when the sun is high enough to get through the canopy and the air is still filled with water molecules. Check out the images to the left taken early in the cool morning during the hot and humid days of summer.

Wednesday, July 16, 2008

Insert backgrounds with PhotoShop


Why go to the beach for a portrait when there is Photoshop. The background on this photo was carefully inserted using layers and fine blending and retouching. Be careful blending hair wisps or you could end up with matted hair. Use varying opacity with clone and paintbrush to salvage as much wispiness as possible.

Monday, July 7, 2008

Reflex: A Self-Portrait


Here's another resurrected exposure from the past, brought to life with the Magic of PhotoShop.

Thursday, May 8, 2008

Macro vs Micro

Macro Photography vs. Micro Photography--in order to show the world of tiny things such as my photo above--Dandelion in a Storm. You need a special macro lens. These can be very expensive so I use Magnifying filters that screw in to the front of your lens--a set of 4 filters can cost as little as $15 on Ebay. The photo above using these cheap filters is very high quality by anyone's standards. The secret being that I used a very small f-stop (f/22). This increased the focal range to the max. I also used a tri-pod and studio flashes which froze the image to increase sharpness.

Now the difference between Micro and Macro. The current definition of Macro-photography refers to the image captured on the film plane of the camera is the same size or larger than the actual subject. The designation 1:4 Macro means one quarter the size of actual Macro, while 1:1 Macro means full size Macro. Micro-photography refers to the image captured on the film plane is much larger than the actual subject (to the extent that an actual microscope could be used). Both show small subjects larger than life when they're enlarged, but as it goes Micro images are extremely close studies of your subject. As close as the camera got to Dandelions, it would still be considered only a Macro shot and not a Micro shot.

Monday, April 21, 2008

Tight crop for better composition--rule of thirds

One thing I like to do , especially with portraits, is to crop tight. In this portrait the main subject is the cat (it's always the animal, unless of course it's a baby). The cat is right-side up and placed in the bottom right quadrant of thirds. People! Watch that mystical rule of thirds!

Saturday, April 12, 2008

Realistic Outdoor flash lighting


Many photographers I've seen don't understand the principle of flash lighting outdoors. It's important that the foreground is never unnaturally brighter than the background. This is also true when photographing an indoor scene where there is a window in the background; make sure you don't render the daytime into nighttime by over exposing (with your flash unit) the interior. Make a realistic balance between interior subjects and the light coming in from the outside.

Thursday, April 10, 2008

Glamour lighting

When I take my studio on the road, I follow the rule for great photography: great subject, great light and great background. I use only artist painted backgrounds. I like Owens Originals best because of their quality and great price. I like a stormy sky with hints of blue. I also use a "friendly" blue sky for most of my school portraits. My favorite lighting is the Alien Bees mono light. It is light weight and powerful. For the above portrait I used a simple set up with one key light with umbrella placed high, lighting the "mask" of the face; I used a silver reflector, throwing reflected light from the key unto the unlit side of the face; I used a hairlight with an umbrella placed high in back of the subject. BUT what makes this portrait adored by the subject--I used a very expensive Nikon soft filter. A good soft filter will SOFTEN but not BLUR. There are plenty of techniques to blur or render out of focus, but for a successful portrait you need to SOFTEN the image and maintain RAZOR SHARP-FOCUS.

Additional comment!!! I've noticed a trend (with the popularity of consumer digital cameras and Hi-def TV) for all photos to be razor sharp. Soft-focus has temporarily taken a back seat to hyper airbrushing using PhotoShop. I've been guilty of this for a long time getting complaints from some customers that I make them look too good!

I've discovered a way to create impeccable soft focus effects after the image has been made with the camera, using PhotoShop and NO airbrushing. Here it is in it's simplest form. With Layers, create a duplicate top layer. Blur heavily the top layer using Gaussian Blur in Filters. With both layers open for view, take top layer and make it less opaque using the slider to 15 to 20% or until it looks good to you. This technique puts any expensive filter to shame and comes in very handy for portrait photography. You can maintain a sharp image or soften it as much as you like.
The principal is that the bottom layer is always razor sharp, but the top layer (which is transparent) diffuses the image without reducing the bottom image's sharpness. This the same thing that all expensive soft filters have tried to accomplish with limited success.

Wednesday, April 9, 2008


Fractals are interesting. What is a fractal? It is based on a mathematical formula developed to synthesize observable creation--and when fed into a computer produce unlimited and sometimes recognizable landscapes and phenomena of the creation around us. Fractal geometry is widely applied today. Fractal art has unlimited artistic potential. Download a fractal art generator (Tierazon-v29) and see what craziness you can discover. The fractal photo on the right I took reminds me of a blue rose. You can combine fractals together with real photos to make interesting psychedelic studies such as my photo Paladin on the left .

Tuesday, April 8, 2008


I took this photo in Albany, NY. Not only was it colorized from it's original b&w but there were also elements added to give it an ethereal sci-fi look. Those elements are lens flare from Photo shop filters, a half earth file borrowed from an on-line source. And mysterious disembodied orbs, following the lines of the auto headlights (traced by a 10 second time exposure in the original negative).

Have fun, get out your old negatives and bring them to life again. You can scan old photos by using a flat-bed scanner or if you've got a ton of old negatives you can purchase an inexpensive film scanner. I paid about $250 for a Minolta-Konica film scanner. It works great!

Monday, April 7, 2008


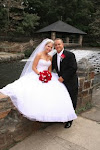
A very popular enhancement, especially for wedding photos, is to spot color elements of the photo. The bouquet is always a favorite but there are many other applications as well. How this is done: select the area of a color image you'd like to retain as colored. Copy the selected area and paste into a new blank file (Photoshop: hit FILE, NEW, BLANK FILE, PASTE). Now under IMAGE, MODE, grayscale the original image to make it b&w. After that, make the image RGB again. It will remain b&w but will now accept color elements. Copy and paste your selected bouquet (very precisely) on top of the b&w bouquet. It makes a charming and very popular photo.

Sunday, April 6, 2008

One of my favorite things to do with my old black and white negatives is to colorize them by using paintbrush washes in Photoshop. Believe it or not, this photo I took of wine pouring from a bottle is actually a black and white image of water pouring from a colorless clear bottle. I used layers to create a gradient background, then I considered interesting colors for the wine and the bottle. The wine, I determined would be blood red and the bottle would be a traditional green color. By using the Photoshop brush with varying opacities you get a much better colorized image than you could ever get with those old transparent oil washes from Marshall.

Saturday, April 5, 2008

Economy bad, weddings sweet

With the economy becoming a nightmare and the future becoming uncertain, make your own bright future by learning thrift. There's a certain elegance and art to living a budgeted lifestyle, where eating out and road trips once again becomes a occasional luxury and home cooking and storing deals in the pantry become the norm. You'd be surprised at the quality of life you can live!
In planning a wedding these days, simplicity is the key. How about an outdoor wedding at home with home-cooked foods? Or hire a caterer and a band! But watch out if it rains.

Friday, April 4, 2008


Pete placed first in class with Nam Vet and Daughter. A study in subtle emotion and race meld. Taken in the late 70s.

Lonesome Low--Winner in it's class at Delaware Photographic Society. Photo taken by Pete in Maine. The title was taken from an old ballad-- The Golden Vanity-- to describe a sailor's helplessness against the elements (and politics). This is a study in contrasting colors and light.

Thursday, April 3, 2008

Hello World!

A new season for wedding photography! Looking forward to the 2009 bookings! Have many availabilities. Give a call 302 636 0868. Great photography great price!